Running motr
Starting motr
a) Start Matlabb) cd to the directory with the motr files in it
c) Enter motr at the Matlab command line and hit return
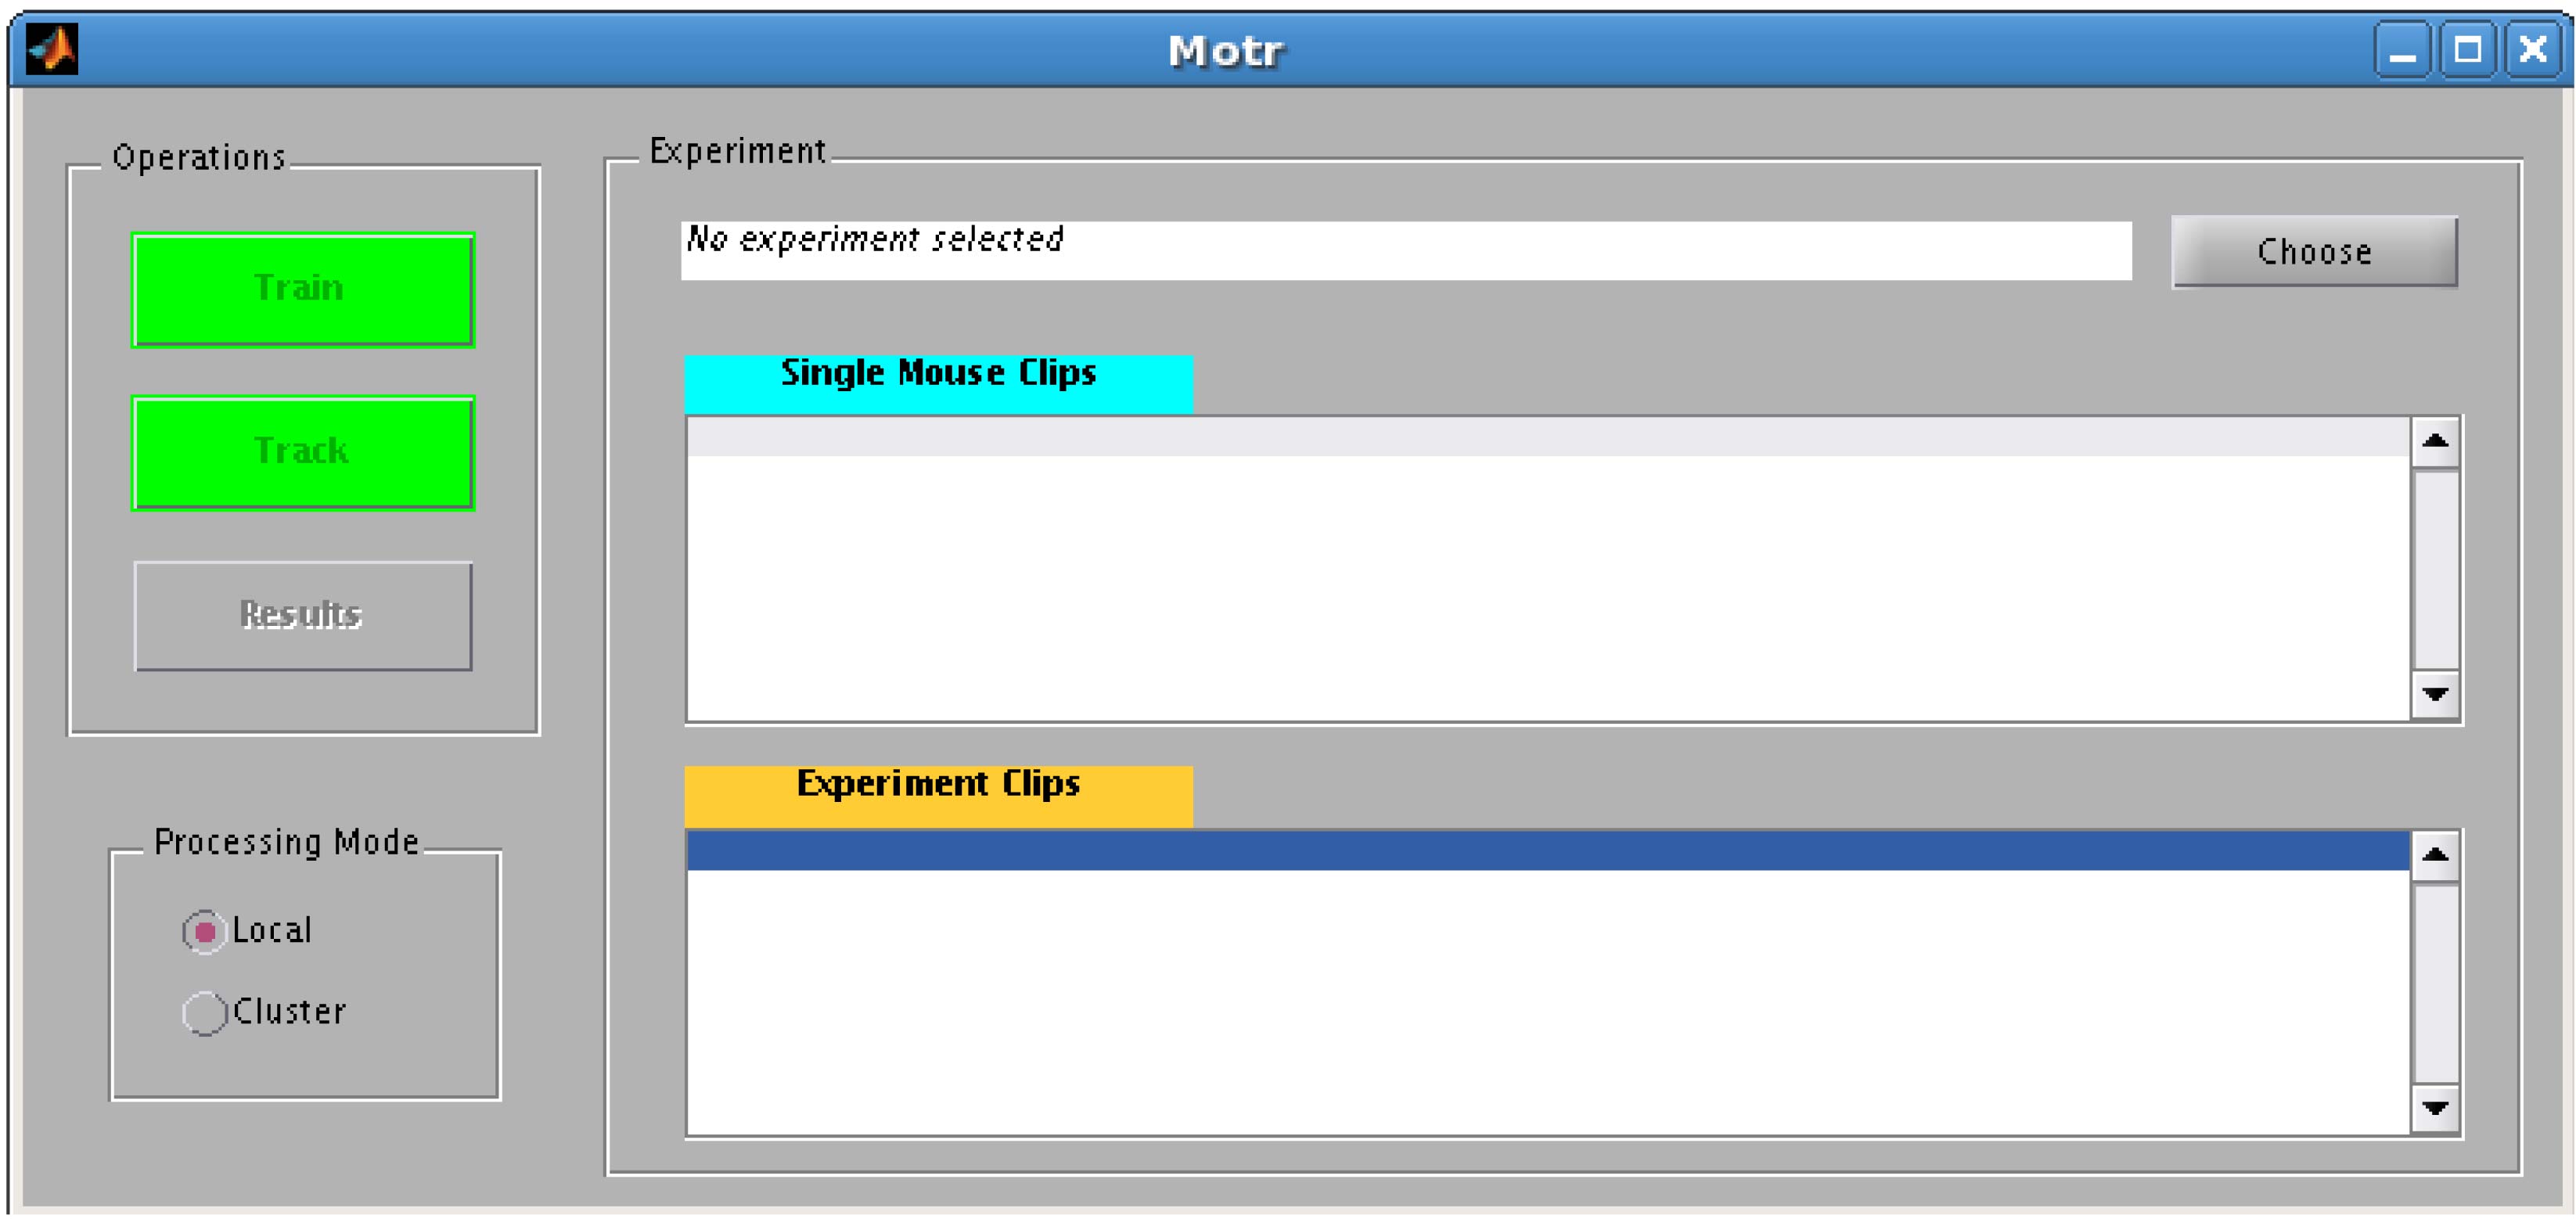
The motr GUI is very simple--there are four buttons: Choose, Train, Track, and Results.
Choose: lets you pick the movies to track
Train: trains the segmentation and identification classifers
Track: tracks the mice using the classifiers
Results: lets you look at what you just tracked
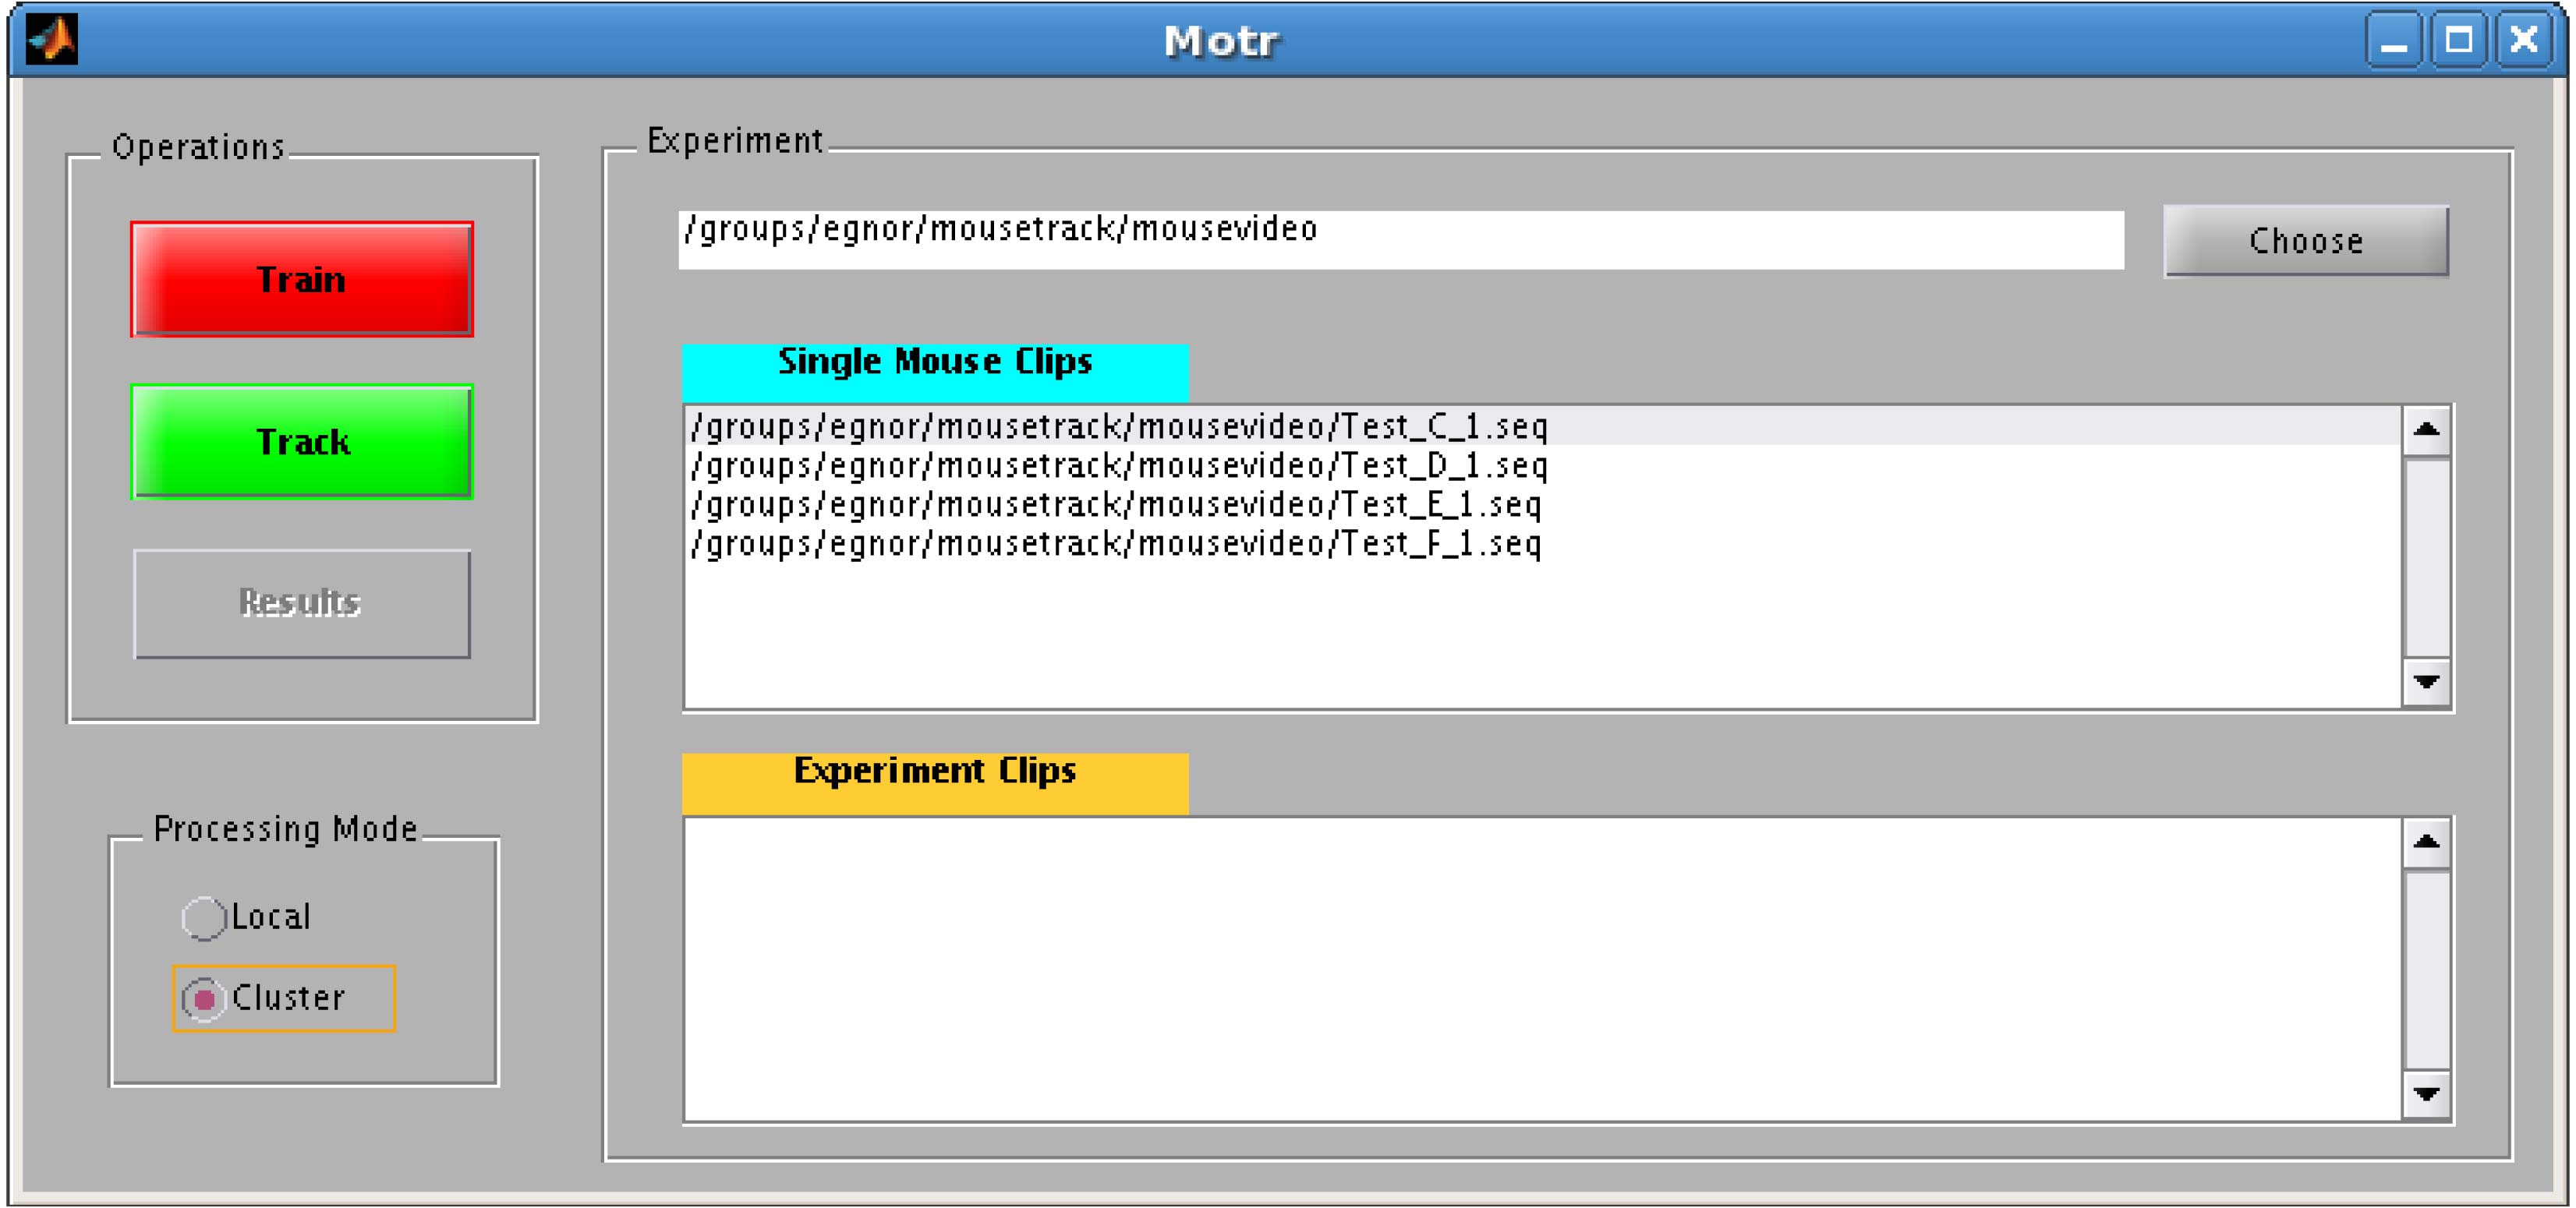
If the Train, Track or Results buttons are red, this means that the operation has already been performed for the current data set. If the buttons are yellow, it means they are in the middle of doing it. If the buttons are green it means you can start analysis.
In the Linux version you can toggle between two processing modes: local and cluster. Local will just run on your local computer, cluster can take advantage of the increased computing power of a computer cluster by splitting the tracking into jobs. The Windows version will currently only run locally.
Start an analysis session
Click on the Choose button in the upper righthand corner and select “Select a new experiment”. This will pop up a box to navigate to the directory you want to keep the analysis files in. Training the identity template
Now click the Train button
This will pop up a box to request the single mouse videos. The title bar of the window that pops up says: select all single-mouse clips - one clip for each mouse. You select with the mouse while holding the Ctrl button down, to select all the single mouse clips. Once you have selected all the single mouse clips, click OK. A message box will pop up that asks “would you like to train now?” (Y/N)
If you say Y, the Train button will turn yellow, and the cursor will have a little rotating icon, indicating its working on training. When it’s done, the Train button will turn red.
Track the mice
Click the Track button.This will prompt for the experimental video file(s) to track.
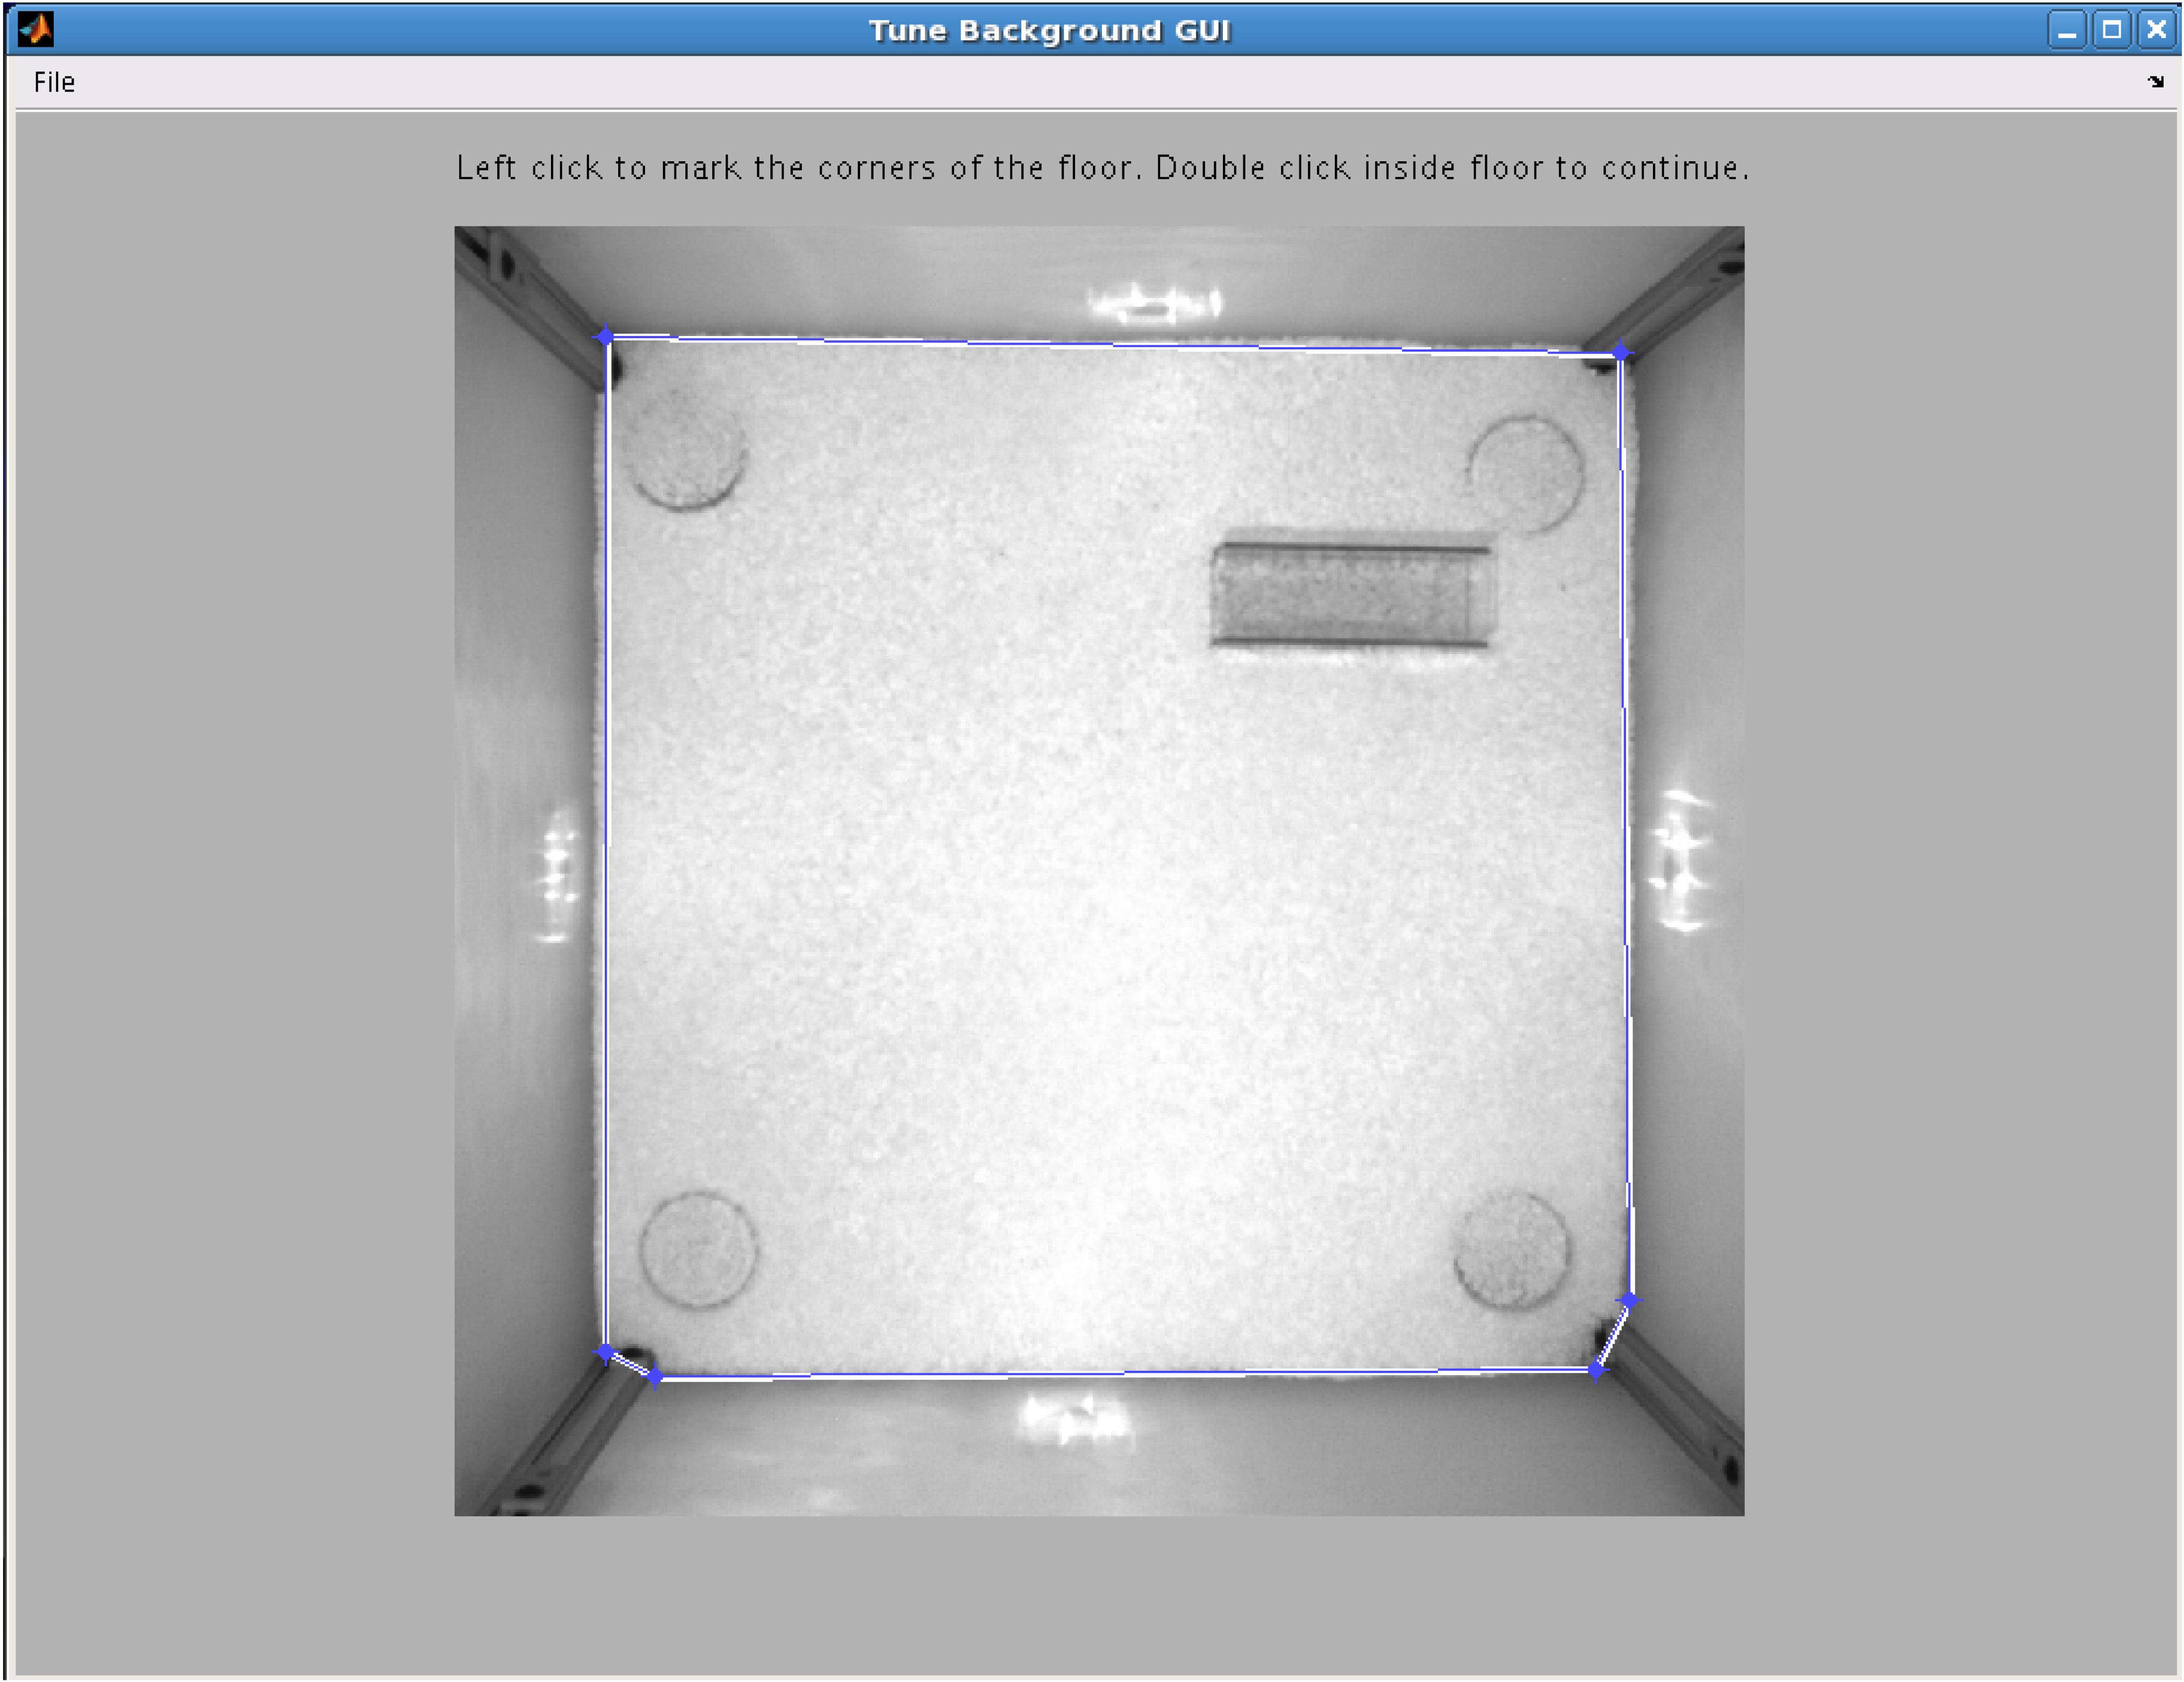
Once you have selected the files to track, the Tune Background GUI will pop up with the instruction “Left click to mark the corners of the floor. Double click inside the floor to continue ”. Left clicking will start the creation of a blue line to outline the floor of the cage. Any pixels outside of the ‘floor’ are automatically considered non-mouse pixels by motr. When you are done, double click inside the floor.
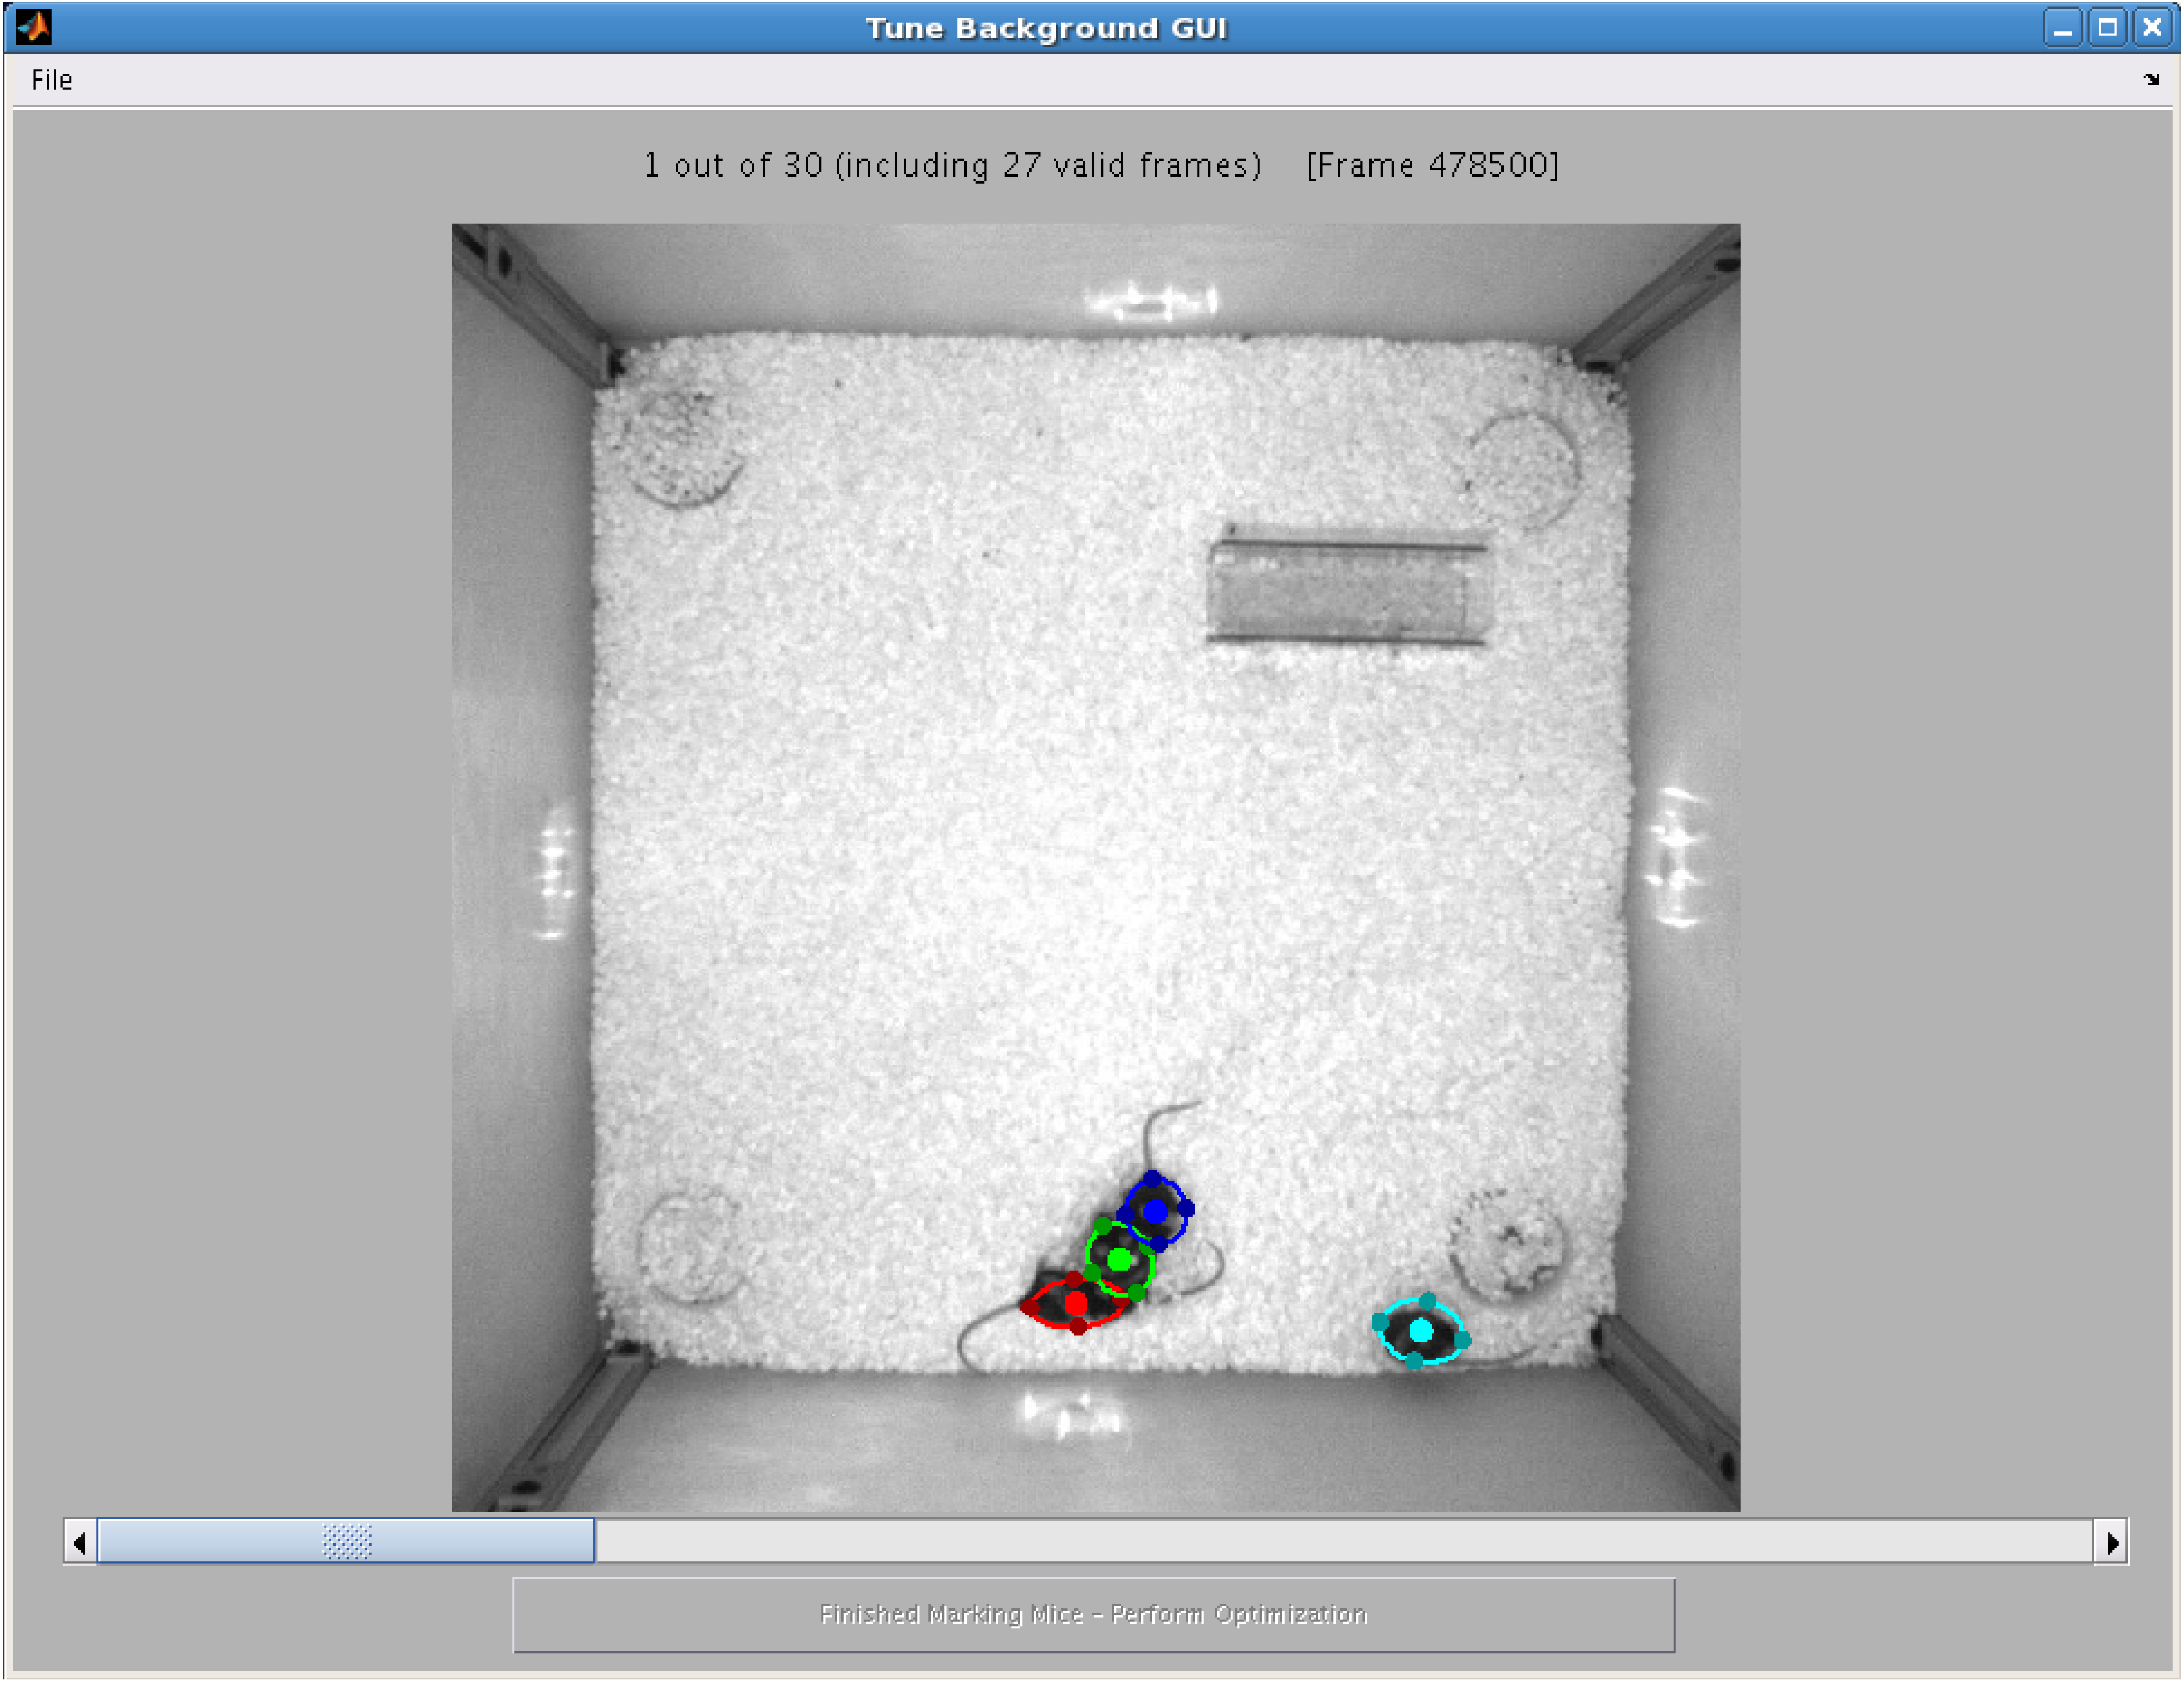
Once tuning is done, there will be colored ellipses in the TuneBackgroundGUI, one for each mouse. Using the slider at the bottom, click through each frame to make sure each mouse has one and only one ellipse on it, and the each mouse's ellipse is approximately the same size and shape as the mouse. If you find errors you can correct them. Move the whole ellipse by click and dragging the center dot, stretch by click and dragging the peripheral dots. If the frame has no ellipses and says “invalid frame”, don’t freak out, just skip it. Don't worry about matching ellipse color to mouse, this is random across frames. When all the frames are correct, click the button at the bottom that says “Finished Marking — Perform Optimization”.
note: In this step, you are teaching motr to discriminate mouse pixels from background pixels in your videos. Motr uses the pixels inside the ellipses you specify as examples of mouse pixels, and uses this information as a guide when segregating mouse pixels from background pixels in your videos. Head– tail direction and identity don’t matter for this step.
The button on the TuneBackgroundGUI will now say “Finished Segmentation Optimization — click to close window”. So, click to close the window. If you don’t you’ll just be sitting there forever.
A message box will pop up that says “Do you want to run tracking now? (Y/N)”. Click Y.
Tracking will now commence. When it is complete the Track button will turn red, and you can look at the results. This will take a while, so now is a good time to get up from your desk and stretch. We often start tracking runs before we leave lab in the evening, so the process can run overnight.
Track more
To add experiment clips, you can click the Track button again, even though it is red. It will pop up a message box that says “Do you want to select new experiment clips?” Options are: [Yes],[Yes, but keep the old ones],[No, keep these]
If you select Yes, you can select new clips. The old clips will be removed from the list.
If you select [Yes, but keep the old ones], you can add new clips.
If you select [No, keep these], you can retrack the current experiment clips.
Note: If you have already tracked this video (the Results files exist) and nothing has changed in the classifiers motr warn you that the track files have already been generated, and ask you if you are sure you want to re-track. You should not re-track if the classifiers haven't changed, because the resulting tracks will be identical--i.e. it's a waste of time and compute power.
Once you have selected more clips a new message box will pop up that says: “Detection is already tuned. Do you want to retune it?” Options are: [Yes, but start from the previous tuning],[Yes, ignore the previous tuning],[No, keep existing tuning].
If you select [Yes, but start from previous tuning] it will prompt you to outline the arena, and verify the mouse segmentation again, but it will start the segmentation classifier training from the previous end point.
If you select [Yes, ignore the previous tuning], it will prompt you to outline the arena, and verify the mouse segmentation again, but it will start the segmentation classifier training from the default values.
If you select [No, keep existing tuning], it will use the classifier trained on the previous clip to segment the new files. If you're not sure which to choose, try [No, keep existing tuning]. If that doesn't give good results, track again, using one of the other two options.
After you make your selection, a message box will pop up that asks “Do you want to run tracking now? Y/N”. Select “Y” to track more.
Look at results
Click the results buttonThis will pop up a window with the first frame of the tracked video, and colored ellipses over the mice. You can scroll through the video, using right and left arrows, or by clicking the play/stop button. You can change the playback speed using the vertical slider on the right.