Recording Video
General recording notes
When it comes to tracking mice, a lot depends on the quality of the input video. It is worth your time to try to make your videos easy to track.Easy to track means:
high contrast between the mice and the background
no features in the environment that occlude the mice
no large features in the environment the same color as the mice
uniform lighting over the arena and over time
patterns on the mice that are different from each other (see figures A and B below).
Picking a camera and recording method
Currently motr can track AVI and Motion JPEG-2000 (.mj2) files. We use a Basler A622f camera. Resolution: We have mostly worked with 768x768 pixels over 0.6x0.6 meters. Higher resolution would likely be fine, lower resolution might well work too. Let us know! motr assumes a mono image. Frame rate: 30 Hz works well for mice (no major teleportation events).Preparing the mice
1. Picking patterns
 We've used variations on the patterns on the left, but there is nothing magic about them. If you are using motr to track only a single mouse, you don't need a pattern at all. If you are tracking multiple mice, though, pick patterns that are easy to apply. The spots are pretty easy to put on with a Q-tip, freehand, but the stripes are much crisper if you mask a pattern onto the fur with tape (lab tape works well).
 Caveat: Be careful that the marked patterns don't break the mice up too much on the video (don't use thick lines) or they will be hard to track.
2. Marking black or agouti mice
Human hair bleach is safe to use on mice. Anesthetize the mice, mix up the bleach, apply the patterns, follow manufacturers instructions for time. Make sure the mice stay anesthetized for the whole time, or the patterns will smear. Be sure to rinse the bleach completely to avoid any skin irritation.3. Marking white mice
All the commercially available black hair dyes we've tested are not black in the infrared, so if you are using IR light, check to make sure your marks will show in the video. If you find a black hair dye that is dark in the IR, let us know! A black sharpie is a convenient way of marking white mice that actually does show up in IR. It doesn't last as long as dye, though. Black tattoo ink is also IR dark, as is squid ink.Preparing the recording arena
Adjust your lighting so that there are no large changes in light intensity across the arena. Adjust the gain on your camera until you get the highest contrast you can between the mice and the background.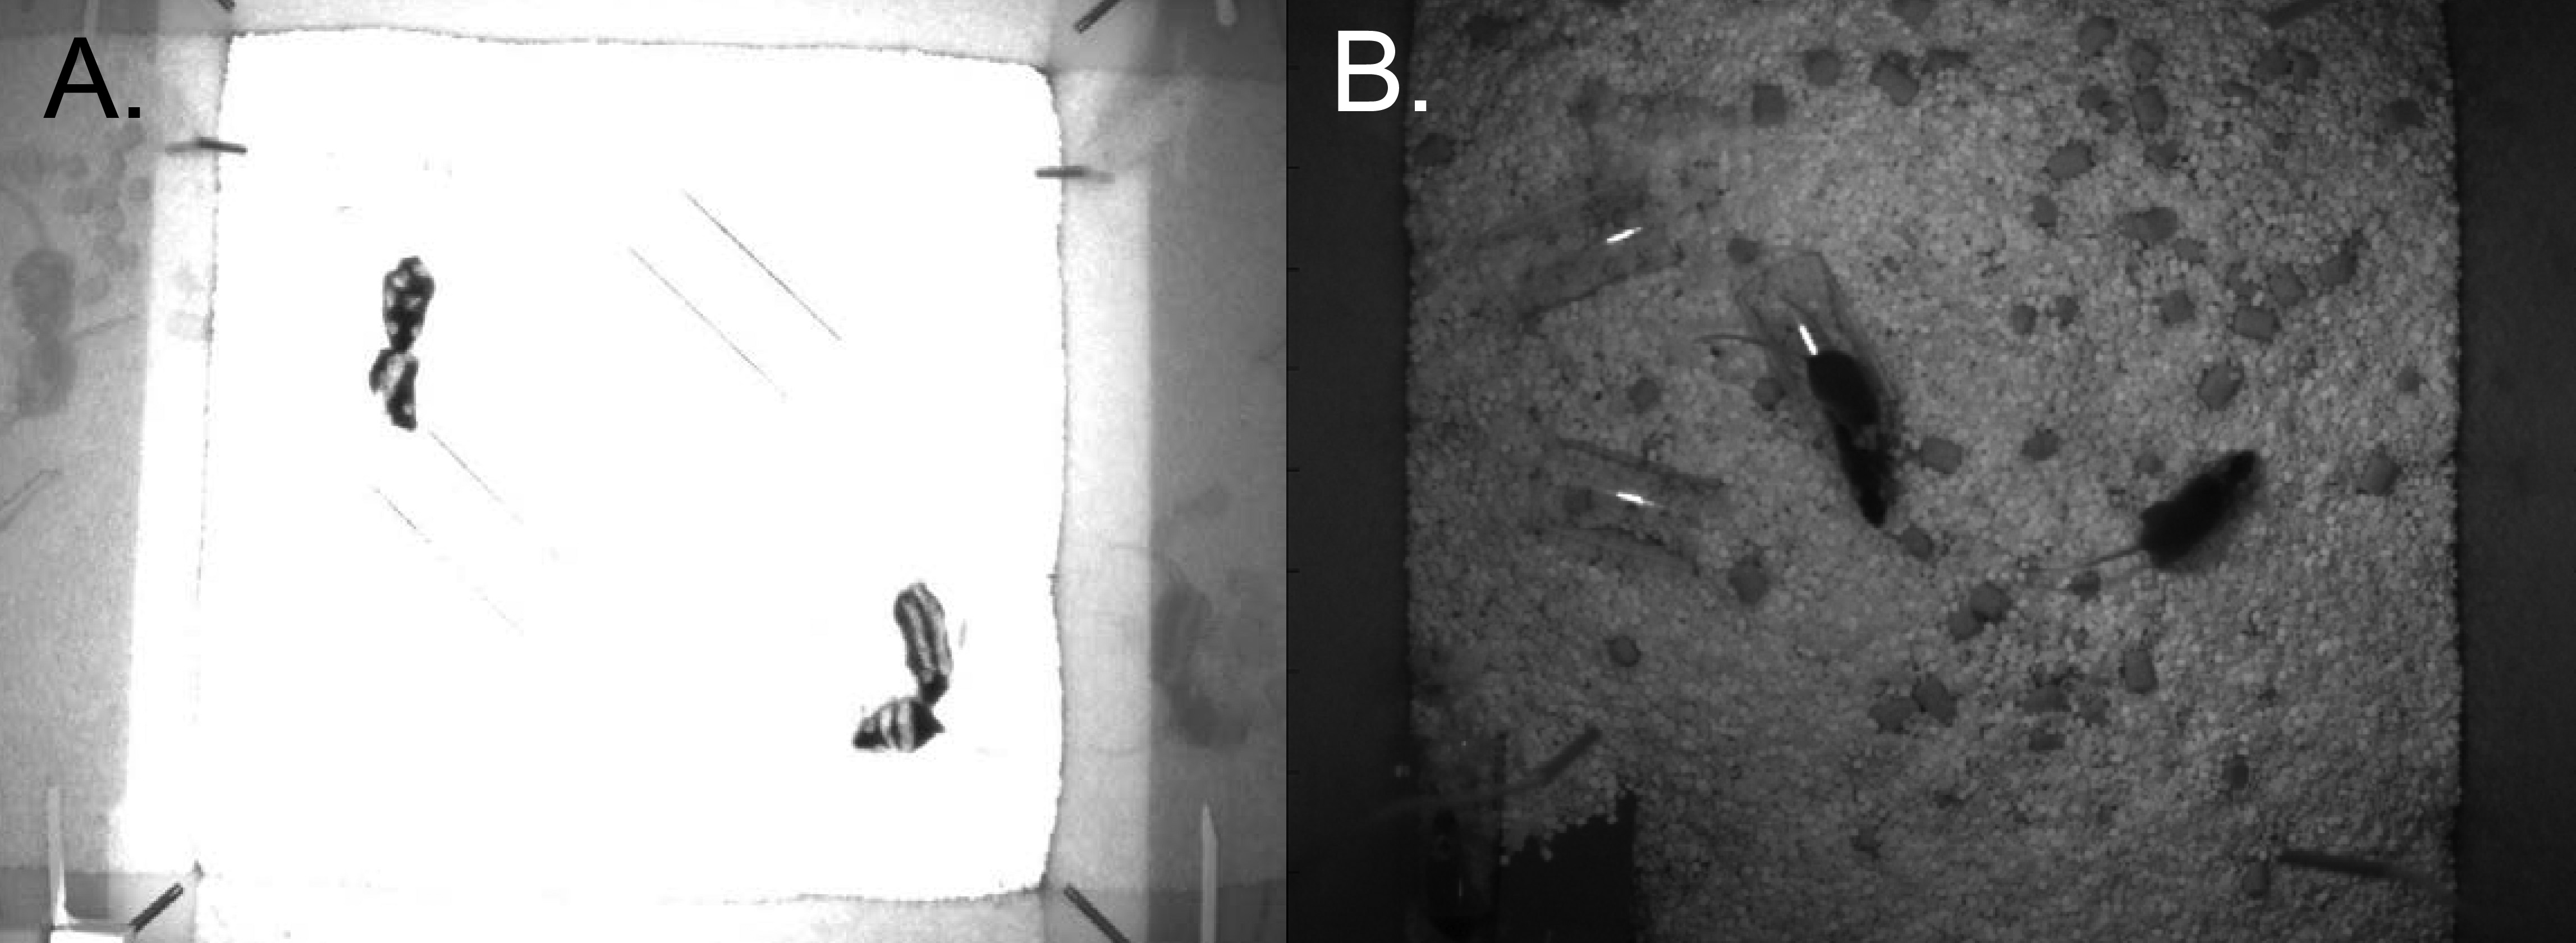
You want your recording to look A, not like B.
A: high contrast between mice and background, high contrast marks on the mice, low change in light intensity across the arena, good contrast between the mice and the walls near the floor, no mouse-colored objects in the arena that aren't mice.
B: low contrast between the mice and the background, low contrast marks on the mice, change in light intensity across the arena, low contrast between the mice and the walls, and dark corner that is close to the same color as the mice.
Note: IR lights are useful if you want to film in the dark (recommended, since mice are nocturnal). An IR pass filter is useful if you want to film across dark/light cycles (need to avoid strong lighting variation across the recording).